Showing posts with label boy. Show all posts

Friday, August 27, 2010

Tutorial: Pillowcase


Since starting on my little one's quilt, I had wanted to complete the gift by making other complimentary accessories such as pillowcases. My mum had just finished sewing a few pillowcases, so I got excited to make mine, or rather, his. I had some fabric leftover from making the backing of the quilt and decided to use them for this mini project.


Ingredients:
- Piece A (front): 1 piece of 28 1/2" x 18 1/2" fabric
- Piece B (back): 1 piece of 29 1/4" x 18 1/2" fabric
- Piece C (tab): 1 piece of 6 1/4" x 18 1/2" fabric
- coordinating thread

Note: Seam allowances are 1/4", unless otherwise stated.


Steps:
1) First, hem one short side of Piece B. This will be the opening of the pillowcase. You can hem any way you like, but I hemmed by folding in 1/2" twice and then sewing near the edge of the hem.

2) Then hem one short side of Piece C.

3) Now, take Piece A and Piece C, and with RIGHT sides together, align the open ends together (not the end with the hem). Sew the pieces together. Since I don't have a serger, I used zigzag stitches along the edges of the seam to keep the fabric from fraying. Now, fold the pieces along the seam so that the WRONG sides are together, and press. Keep the pieces in this position for sewing in the next step.

4) With RIGHT sides together (Piece A and Piece B), pin and sew along the 3 open edges. Make sure Piece A is between Piece B and Piece C when sewing this step. Again, I used zigzag stitches along the edges.

5) Finally, turn your pillowcase right side out, stuff it with a nice fluffy pillow and make your little one smile :)

Saturday, August 14, 2010

Fabric Review: Jillian Phillip's To the Rescue collection by Hoffman Fabrics

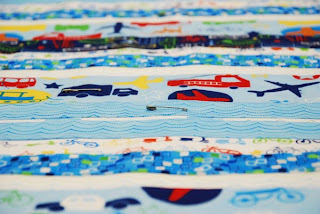
I love, love, love Jillian Phillip's work!! No wonder I tend to look for her fabrics. The first time I fell in love with her designs was when I stumbled upon her To the Rescue line by Hoffman Fabrics. The collection felt so complete for a little boy - my little prince, that is. :) As a mommy of an active little boy, I'm always in search of adorable prints for boys. Its bad enough that I don't know how to sew boys clothes (yes, that realm is still foreign to me) and I keep wanting to try sewing girl dresses (yes, I've tried a few), so in the end, I've never really sewn anything for my baby. Until I found Jillian Phillips!!! That was when I tried my first attempt at sewing a toddler quilt.

When I received the To the Rescue collection in the mail, I was ecstatic. My heart thumped with joy. The colours were beautiful. The designs and colours mixed and matched flawlessly and effortlessly. And my little boy loved looking at the cars and trains and planes, always telling me which was which.


Check out my tutorial for a toddler quilt using these beautiful fabrics here.


Sunday, August 8, 2010

Tutorial: Hoffman Fabrics 'To the Rescue' Toddler Quilt Pictorial

Before reading any further, please be warned that I am not a professional quilter. I'm just here sharing my experience. This is my first quilting experience ever! When I saw the 'To the Rescue' line by Jillian Phillips for Hoffman Fabrics, it was love at first sight. They were too perfect for my baby boy! And coincidentally, I found a free quilt pattern by Vicki Stratton called the Easy Strips Pattern for a toddler-sized quilt. How cool is that?! It was begging me to try it out. So here goes...

Ingredients:
1) To the Rescue collection in various cuts (refer pattern)
2) Coordinating backing fabric (I used 3 yards because I had to sew 3 pieces together to get the desired width, but an easier choice would be to use wide width fabric for the backing)
3) Warm & Natural cotton batting
4) Coordinating quilting thread

NOTE: Seam allowances are 1/4" unless otherwise stated.

Steps:
1) Preparing the fabric: Some quilters prewash their fabric and some don't. I decided not to do prewashing for this project simply because I bought just enough fabric and I didn't want to prewash the batting either.


2) Cutting the fabric: This is the part that I dread most in any sewing project - the cutting! I'm just not a fan. Just follow the instructions in the pattern. Once cut, organise the pieces into their respective blocks for easy sewing later.


3) Constructing the blocks: Sew the strips for each block together. After sewing each strip, press the seams. I prefer pressing the seams to one side (usually to the side of the darker fabric), rather than pressing them open. For the 'road' strip, simply follow the instructions in the pattern. I found that chain piecing this part was a big help.


4) Piecing the blocks: Once you have all the blocks ready, it's time to put the blocks together. Sew and press, sew and press, sew and press. Yes, the process is rather tedious, but the end result is breathtaking! I loved looking at the back of my quilt top!! lol...Oh yes, make sure you trim off any excess before going on to the next step. Your quilt top should be ready for sewing on the borders.

5) Sewing on the inner and outer borders: Yes, this pattern has 2 borders. I love the way the colour values play in this quilt top. Sew and press, sew and press, sew and press, and voila - a beautiful and easy quilt top ready for layering. Take a break, we're almost there!

6) Preparing the backing: When choosing backing fabric, its easier to hide mistakes with a multi-coloured and busy print, but you can always use solid fabrics provided that you are using a thread colour that blends with the fabric. I read that the backing and batting of the quilt should be bigger (at least 3" - 4" on all sides) than the quilt top when you layer the quilt as the quilting process might shrink them a bit. I also read that you should avoid sewing down the middle of the backing fabric when piecing 2 pieces of fabric together. So, instead, I added a few inches of fabric to the left and right of my backing fabric by piecing 3 pieces of fabric together to get the desired width. Sew and press. I don't know if this is how it should be done, but that's what I did.


7) Layering the quilt: Find a flat and smooth surface such as a clean floor or mattress where you can tape your backing fabric to it using masking tape. You want your fabric to be flat and taut and NOT stretched. Make sure the WRONG side of the backing is facing up. Then, lay the batting on top of the backing. It is best if your batting has been unfolded and laid out prior to layering to reduce wrinkles. Next, lay your quilt top on top of the batting with the RIGHT side facing up. Smooth it flat starting in the middle and working out towards the edges.


8) Basting the quilt: Now you have to fasten those 3 layers together temporarily so that they'll stay in place when you're quilting. You can either use basting stitches or pins. I chose the latter. Start pinning from the centre of the quilt and work outwards. I read that it is best for the pins to be about 6" apart from each other, but I basically worked with whatever pins I had. Make sure you smooth out the fabric as you pin along.


9) Quilting: You can choose to machine quilt or hand quilt as desired. I decided to go with machine quilting, though I now realise that hand quilting effects are really pretty and I should've gone with that! Initially I wanted to try free motion quilting, but in the end decided to 'stitch in the ditch' as the quilt top was full of nice long strips. As this was my first attempt at quilting, I must say that it was VERY frustrating when my machine stitching went a bit haywire. Sometimes my thread tension was off or my walking foot wasn't 'walking' enough. I must've done something wrong somewhere.... Right now, I'm still on this step. Hopefully, I can finish quilting and go on to the next two steps. I'll have to upload the pics once they're ready.

10) Binding the quilt: Refer to Heather Bailey's wonderful binding tutorial.

11) Present the quilt to your precious little one: Priceless! (I hope!! since I haven't got around to this step yet. lol)

Happy sewing!

Related Posts with Thumbnails